My custom bridal service is something I’ve honed as a side-gig for the past five years. I work 1-on-1 with my clients to create unique designs that get turned into perfectly tailored wearable art pieces that represent their truest self. It’s a fairly DIY process that I do in partnership with a wonderful seamstress who has taught me so much, and some special fabric and finishing vendors who believe in and support my small biz.
This is not a story about exponential growth, efficiency, or metrics (although I do have a 100% client satisfaction rating). You can see those numbers elsewhere in my portfolio. This is a story about slow fashion, building relationships, and executing at the height of my craft. The work feels important and empowering, and it’s an honor to create with such intention.
You can see all my past brides at hannahamundson.squarespace.com
Here’s an example of the process for one client, from sketch through final creation, a process which takes a minimum of 6 months in most cases. I’ve got 15 total clients under my belt, so if you’d like to see more behind the scenes content, please inquire through my contact form!
This is the story of my time working with Elaine.
Elaine came to me not really sure what she wanted. She loved the feminine draping of a Vivienne Westwood style she tried on, but had seen so many people wear it and wanted to be different. She also loves fashion, specifically vintage Galliano, Chanel, and Dior. I told her to lean into those references and then compiled the following organizational moodboard to synthesize all the types of imagery she had sent me into categories.

I talked her through the four top and four bottom categories I had identified based on different silhouettes or design details, got her feedback on which ones she was feeling most drawn too, took some photos of her, and then took to my sketchbook (in this case, photoshop) to begin putting together design ideas.

Some sketches close up:


During this design review, we identified that she was feeling drawn to the voluminous skirts, rather than the more slim a-line silhouettes, but she didn’t love either of the two options presented. We went back to Pinterest to look for more inspiration and stumbled upon this Chanel ‘99 tousled taffeta number that we both loved. I added it to the inspiration and went into round two designs, presenting her with three distinct groups.


As soon as she saw the third group, she had no problem letting go of the first two assortments. The third one felt like HER in all the right ways - high fashion, paying homage to classic bridal taffeta ballgowns, with a quirky irreverence via the asymmetrical pick-ups, sculptural shoulder detail, and peekaboo waistline. A perfect marriage. At that point, she was ready to move forward into developing this design.
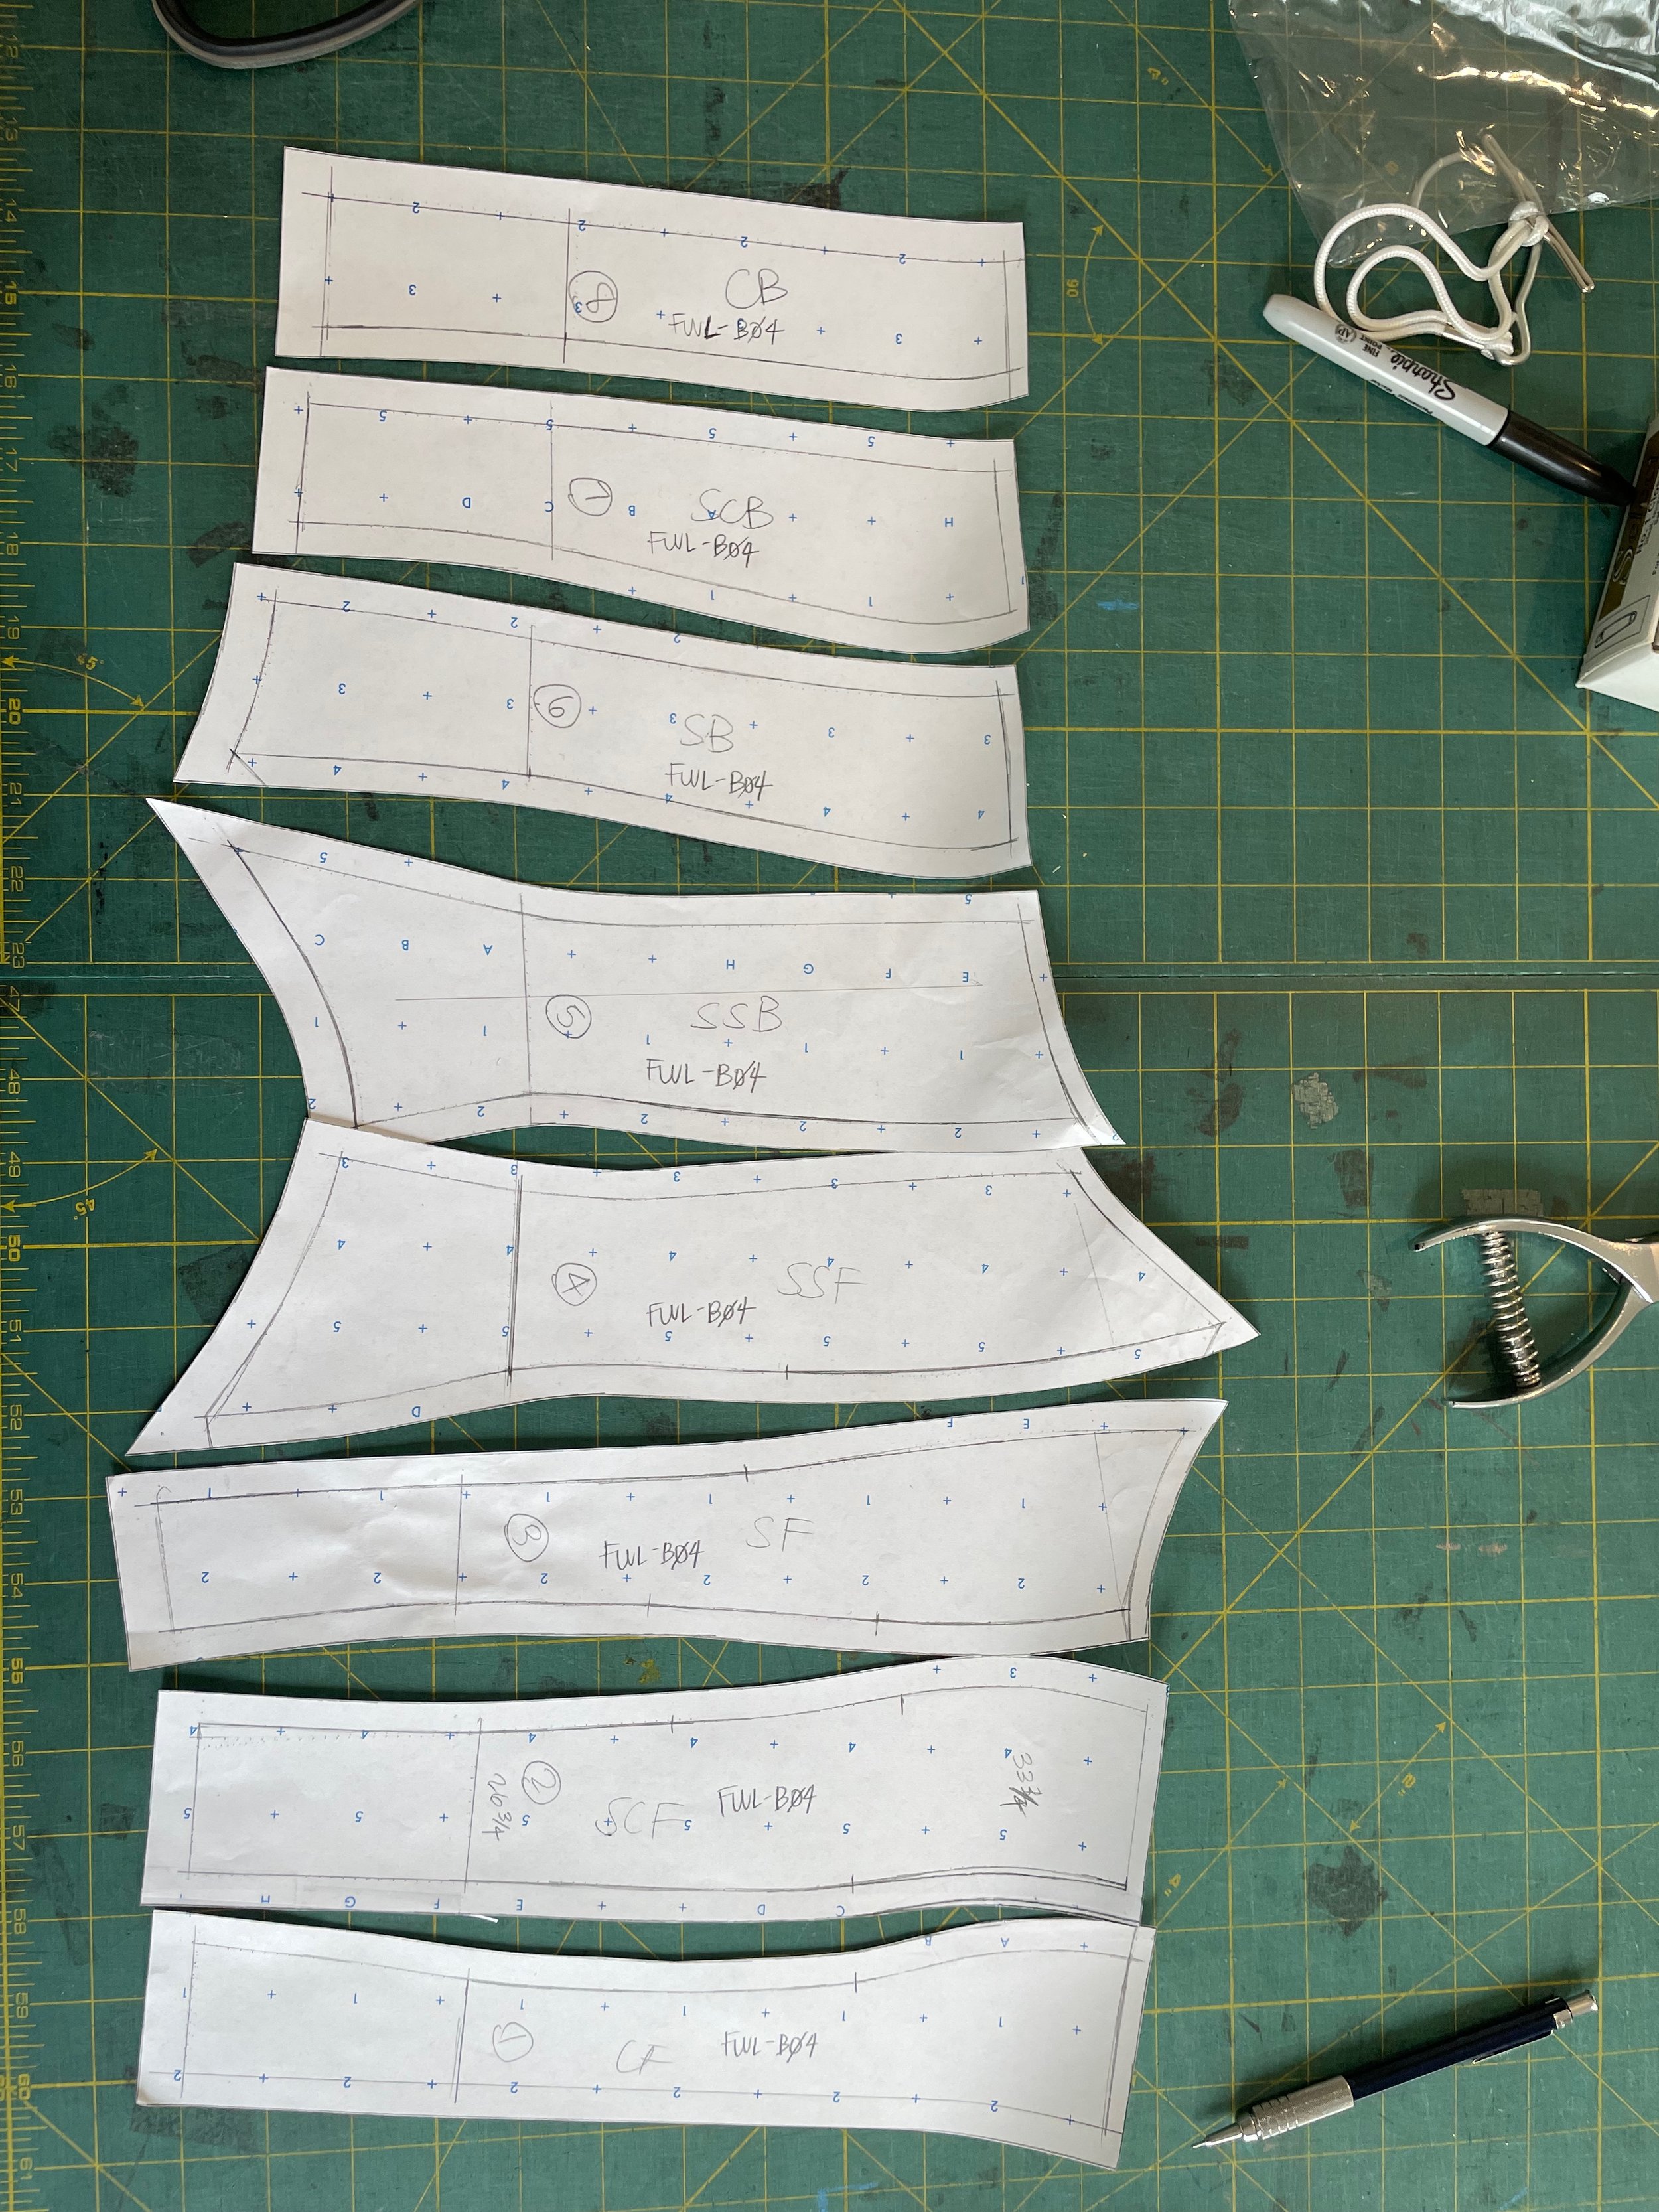

For corsetry, I build a custom dress-form by layering cotton batting onto my mannequin until I get something as close as possible to the client’s body measurements. I then tape off style lines, drape in muslin, and balance seams and make spec adjustments on the paper trace-off. For the skirt, I decided to start by draping the entire silhouette in three squares, determined by the width of the fabric. I ended up reducing the shirring volume at the back waist, but otherwise the pattern was quite simple! I faced a layer of netting behind the taffeta to help support the volume, and hung ribbons down from the waist on the inside to create the asymmetrical, flowy pick-ups. We were ready to fit!


She was so happy with the results. I even mocked up the shoulder detail which I hadn’t worked on yet, and we continued to return to these photos when I was finally ready to develop that last detail. I sent her a mock up of the hem options (I wanted a bubble hem but she wasn’t sure about it), and made the pattern adjustments.
Our next fitting would be a demi-constructed corset in the selected taffeta fabric, to confirm the adjustments and finalize her color selection (a good thing, because she decided against the Snow White after seeing it full body, and we went with a slightly patina-d shade called Porcelain instead.


With all the details worked out, I ordered the final fabrics, cut all the pieces, and delivered the bundle to my seamstress. She knows me well enough by now to not need too much in terms of a hand-off, but I always give her some technical sketches of the desired construction, and my first fit sample with notes on what was adjusted. In the third fitting, we played around with different skirt pick-up arrangements and draping for the shoulder piece. We also finalized the veil length and style.


Once we were satisfied with the direction, I moved back to the dress form to finesse the details and finish everything permanently. Elaine came by for a final fitting and took the dress home with her.
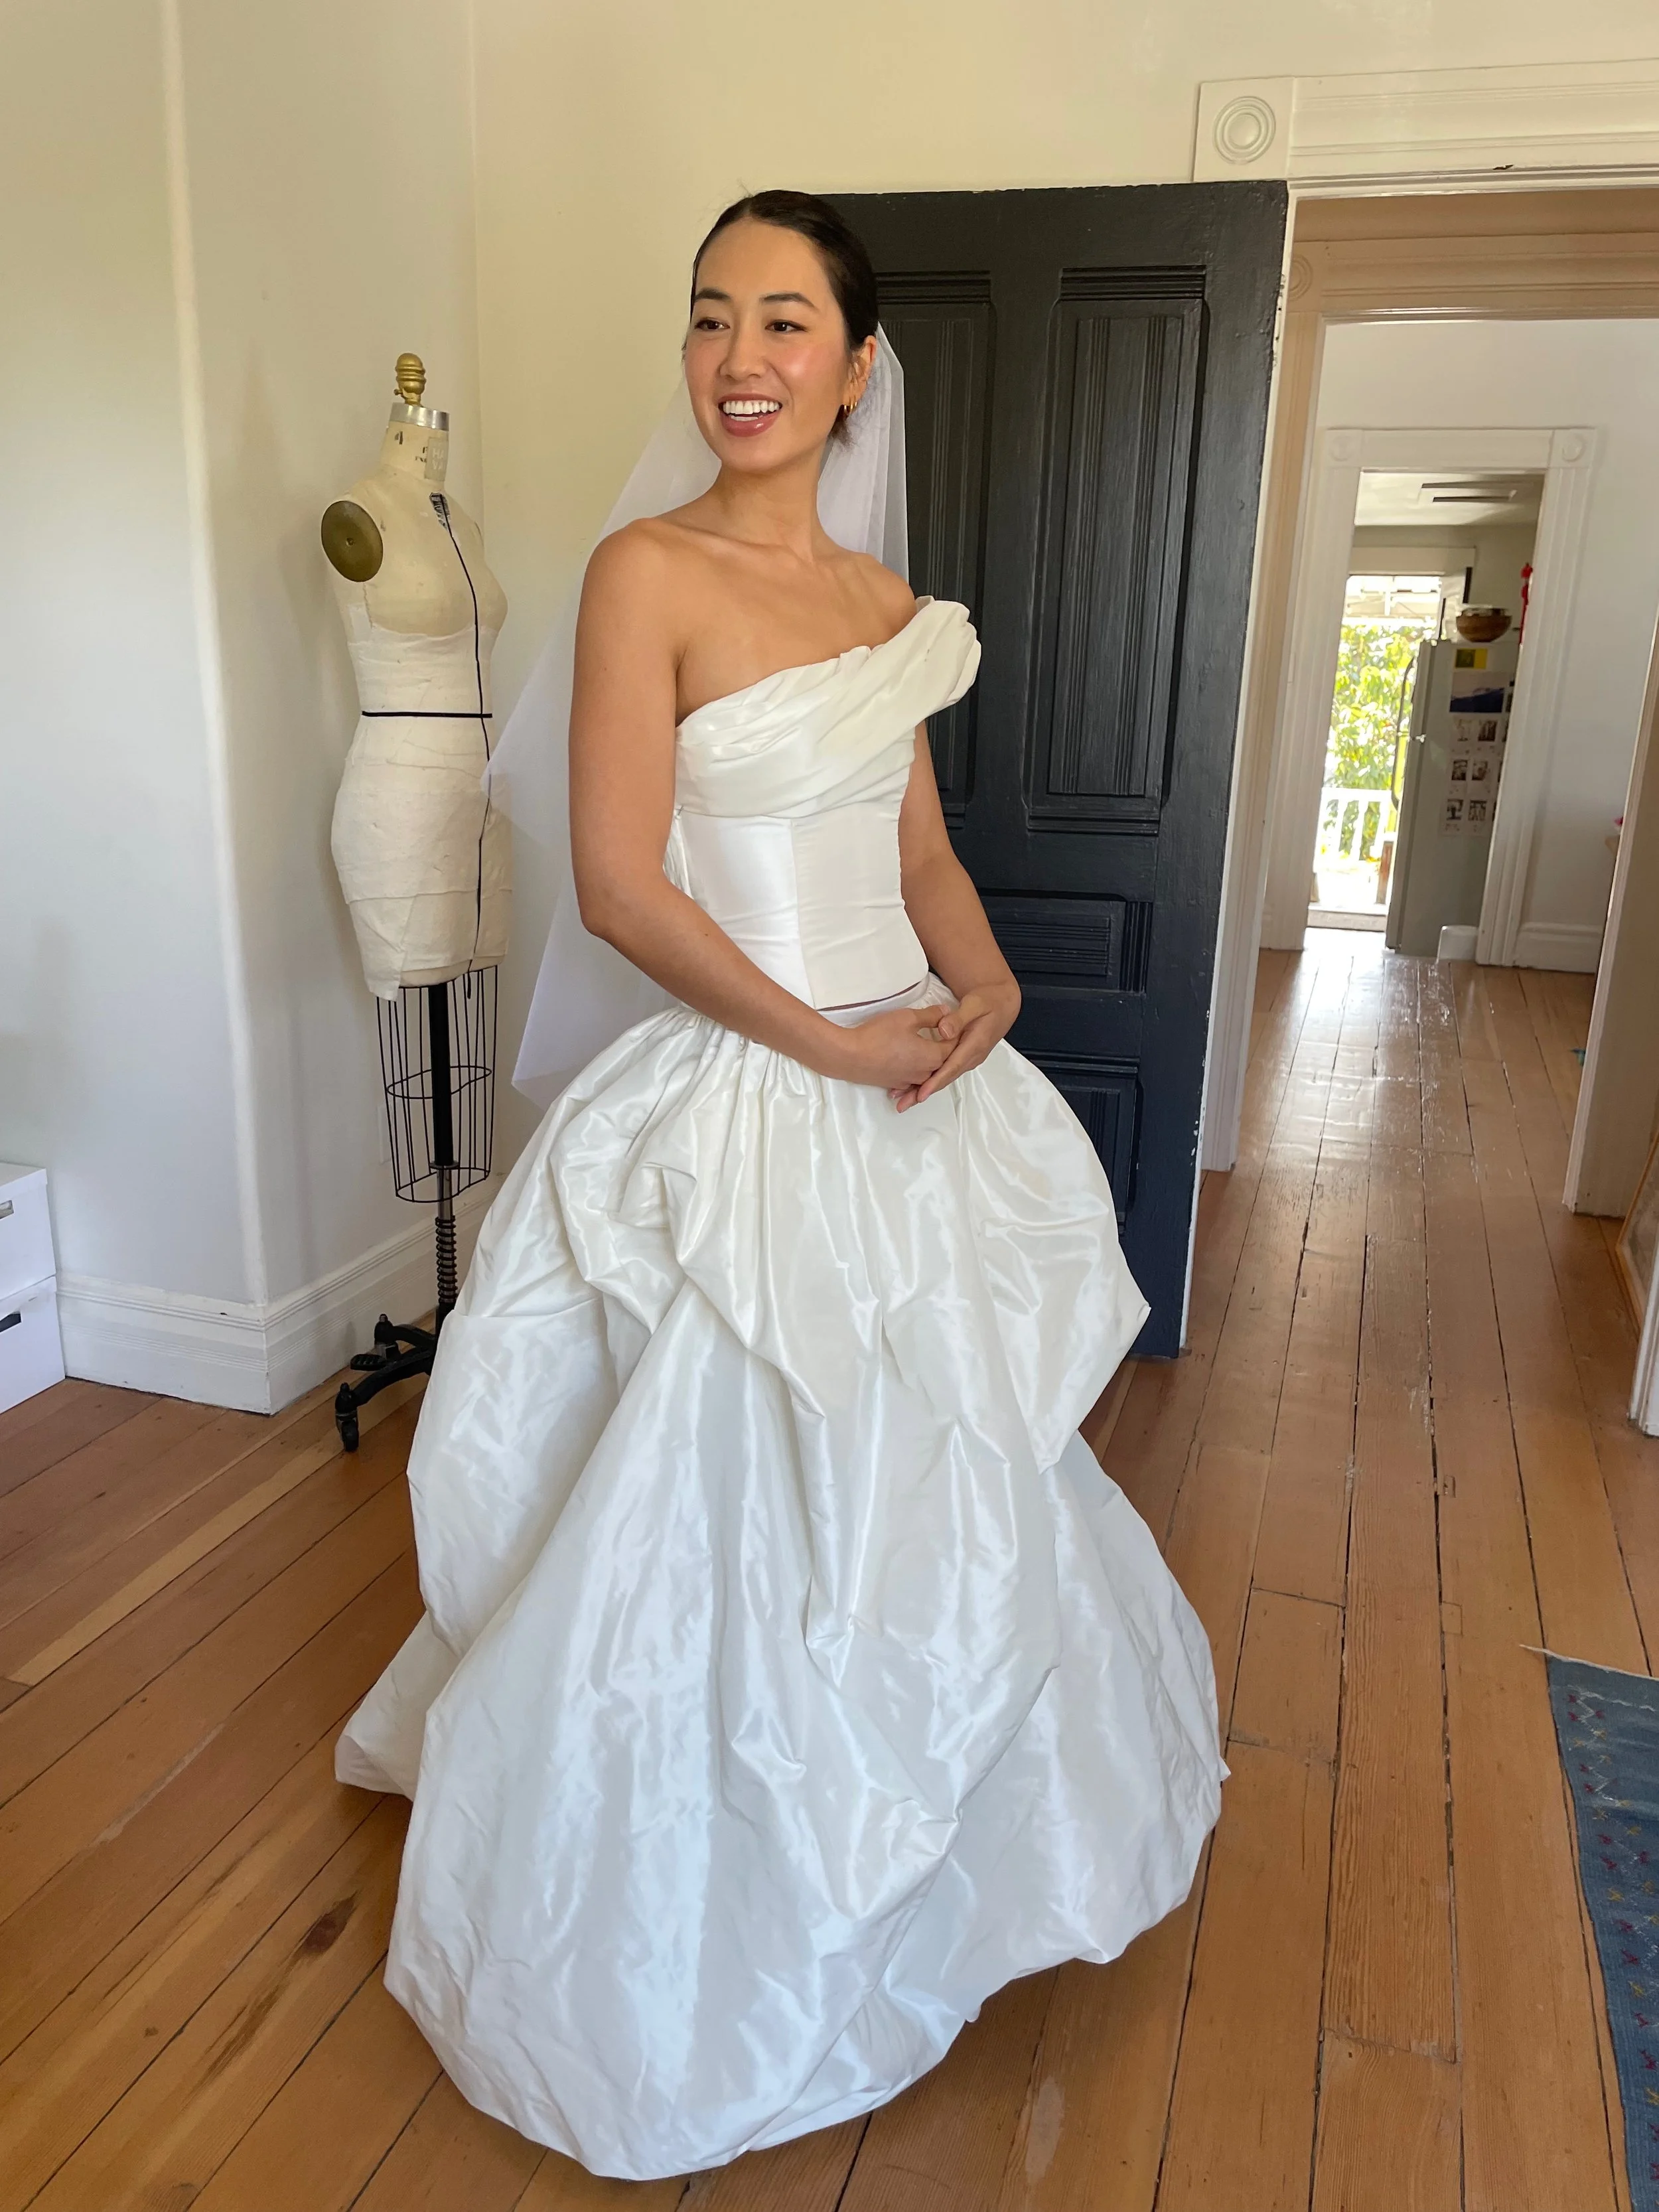


I also like to do a photoshoot of each piece in my studio and share the photos with my client as another wedding keepsake:


